Understanding the Need for a Loft in Your Shed
 A loft can significantly transform your shed’s storage capacity, especially if you’re dealing with limited space. It may appear to be a daunting endeavor initially, yet it brings about extraordinary rewards.
The beauty of adding a loft to your small shed is that it essentially doubles up as extra floor area without extending the footprint of your structure. This comes in handy when outdoor space is restricted or property limitations prevent outward expansion.
Beyond just offering additional room for storing items, lofts also promote better organization within sheds. By moving certain things overhead and freeing up ground-level spaces, everyday tools become more accessible while seasonal stuff gets tucked away neatly above.
Transforming Small Sheds into Functional Spaces
In smaller structures where every square foot counts, incorporating a loft presents an ingenious way to optimize utility from existing dimensions. Homeowners and handymen alike are now turning towards vertical spaces often left unused in their quest for enhanced functionality.
 This addition not only increases storage; it adds versatility too. With careful planning around headroom and access points (like ladders), these elevated areas can serve dual purposes – providing functional workspace on lower levels while ensuring secure long-term storage above.
Regardless of whether you own a garden tool repository, gym, bar shed, hunting gear storehouse, etc., constructing a well-designed loft makes sense. Not only does this simple project enhance its functionality manifold, but it turns any ordinary structure extraordinary.
1. Decide on loft height.
 Finding the right balance between maximizing vertical space and ensuring enough clearance beneath is crucial when deciding on loft height. If this area will primarily serve as additional storage, consider positioning it higher up – transforming even smaller sheds into larger ones through clever use of roof space.
On another note, if people are likely going to spend time here like using it as a workspace, you need adequate headroom so they don’t bump their heads against ceiling joists.
Researching local building codes and regulations is also important, as they may have specific requirements for loft height, which could help guide decisions regarding suitable heights.
2. Assemble necessary supplies.
Gathering necessary supplies before embarking upon construction saves valuable time during the execution phase. Materials needed include lumber (for framing), plywood (for flooring), screws or nails, power drill, saw, among others. Safety equipment like gloves and protective eyewear might also come in handy depending upon the nature of tasks involved.
 Having everything ready at hand before beginning work prevents unexpected trips mid-project disrupting workflow significantly.
A well-thought-out approach towards constructing a shed loft not only ensures smoother implementation but results in more efficient utilization too. So invest some thought and effort into these preparatory steps – the foundation stone towards success lies within them.
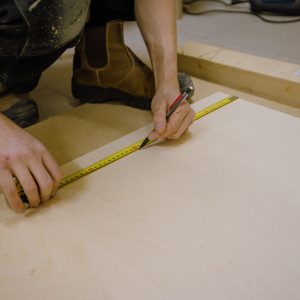
3. Measure correctly for floor joists.
 The first order of business? Accurate measurements of width and depth inside your shed. These numbers are crucial because they’ll determine how long each joist needs to be cut so that everything fits snugly between the walls of your small or large shed.
Beyond individual lengths, calculating the total number needed based on spacing is another key aspect. Usually, 16 inches apart from center works well, but depending upon the load capacity desired and size constraints, adjustments might need to be made.
4. Install first boards at desired height.
 Moving forward with these precise measurements under our belt, we’re ready to install boards at the chosen height level inside the shed. Remember this: The height determines the overall usability and accessibility of the space above, so choose wisely considering factors like ceiling clearance and the type of items planned for storage there.
If any doubts creep in during the installation process regarding board placement or securement methods, don’t panic. There are plenty of resources available online that provide detailed instructions and tips.
This ensures safety while maximizing the utility value of the new overhead space created by adding partial lofts or full-sized ones into gable sheds, gambrel roofs, etc., making them feel larger than before due to the increased interior roof area available now.
6. Determine spacing based on usage.
 Moving forward, you’ll need to decide how far apart these joists should be placed – a decision influenced by what exactly you plan on storing up there. If we’re talking lightweight items like holiday decorations or camping gear, then wider spacing could work well.
But if heavier objects are part of your storage plans (think power tools or furniture), closer spacing would provide added support and safety.
Note: Always prioritize safety when dealing with any construction project.
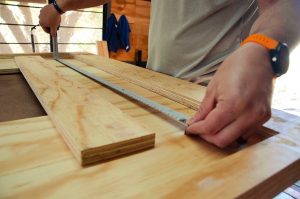
7. Measure and mark plywood accurately.
 Measure and delineate the necessary segments on your sheet of plywood to commence. The measurements should align perfectly with those between the floor joists that we installed earlier for our shed roof’s storage area.
Precision at this stage cannot be overstated – any inaccuracies could lead to waste or instability down the line when using this as part of your large or small shed construction process. Whether it’s a full-sized loft or partial lofts you’re building, getting these dimensions right from the start will save time later.
8. Ensure secure installation of plywood over joists.
Moving forward, once accurate cuts have been made based on previous markings, secure each piece onto the corresponding section within the framework. For securing them firmly over the underlying frame structure, screws are used which provide necessary rigidity and longevity.
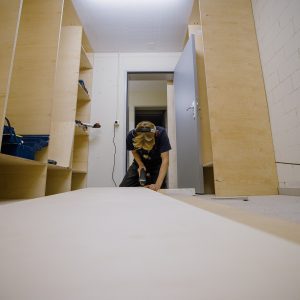 This isn’t just about having extra space but making sure it lasts long too. To ensure maximum durability, experts recommend spacing screws around 6 inches apart along edges and every 12 inches across the middle portion.
By adhering closely to proper guidelines during the installation process, not only does one achieve a solid foundation but prevents potential sagging due to warping caused by uneven weight distribution later on.
10. Choose the right style of ladder that fits in the available space.
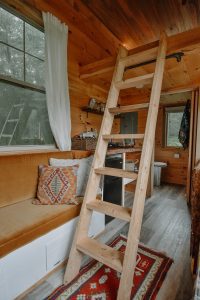 A traditional straight ladder could be just what you need for that rustic charm while still serving its purpose well. However, if floor space around your shed is at a premium, then modern designs like telescoping ladders might be more suitable as they are compact yet extendable when needed.
Safety should never take second place in any DIY project, especially one involving heights such as building lofts. Therefore, ensure sturdy rungs with anti-slip features and include handrails on either side whenever possible. These safety measures will provide added security during ascent or descent from the storage loft area.
Your choice of design must reflect personal preferences along with practical needs based on how frequently you plan to use the attic space and what items will be stored there.
Understanding Door Swing Direction
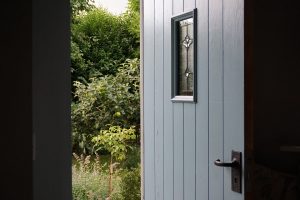 A well-hung door swings open smoothly without any obstructions. “Door swing” indicates the path a door moves when opened – inwards, outwards, left or right. This guide can help you determine how best to alter your existing setup for optimal results.
In smaller spaces like sheds, doors are usually designed such that they nest against a wall when opened. This helps maximize floor space usage while minimizing obstruction from the doorway itself.
Balancing Aesthetics And Functionality
 Sometimes minor alterations can make major differences, especially within confined spaces like lofts inside sheds where every inch counts. While making changes, always ensure a balance between aesthetics and practicality because at the end, what matters most is creating a comfortable usable environment where things work seamlessly together rather than being mere eye candy pieces.
Creating Zones According To Item Categories
To kick things off, split your shed into different zones based on what you’re storing. This could mean having one zone for gardening tools, another for outdoor games – whatever works best for you. The objective is to make it effortless to locate the exact item you require when necessary.

In each zone, consider using storage bins that are clearly labeled with their contents so there’s no guesswork involved in locating items. For smaller bits and bobs like screws or nails, small clear containers work wonders as they let everything remain visible at all times.
Aim to place frequently used items within arm’s reach while less commonly used ones can be stored higher up where they won’t get underfoot but will still be accessible when needed.
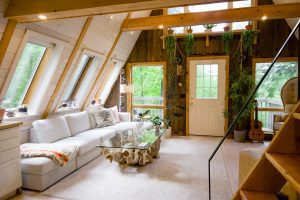
Making Use Of The Loft Space
Your newly built loft area presents an excellent opportunity for stashing away seasonal gear such as holiday decorations or camping equipment which isn’t required year-round. It’s also ideal for larger items that take too much floor space below, think spare tires or extra furniture covers.
You might want to invest in sturdy plastic storage boxes. They offer protection against dust and pests yet allow visibility inside without needing constant opening-up every time.

This methodical approach towards organizing helps maintain orderliness even after adding new stuff over time. Remember, regular tidying-up sessions ensure this system stays effective long-term.